Recorded a beautiful video on your iPhone, only to find the file is huge or doesn’t look the way you expected? You’re not alone. Knowing how to change video quality on iPhone after recording can help you save storage, share clips faster, and keep your footage looking its best on every platform.
In this guide, you’ll learn what you can and cannot change after the fact, plus practical ways to reduce iPhone video size, compress iPhone videos, and get them ready for social media, email, or long‑term storage.
Why Video Quality Matters on iPhone
The iPhone camera is powerful enough to shoot high‑resolution video that rivals dedicated cameras. That’s great for quality, but not always ideal for:
- Limited storage space
- Slow internet or mobile data
- Apps and platforms that heavily compress large files
If you always shoot in 4K or high frame rates, your videos can quickly fill your iPhone’s storage and become difficult to send or upload. That’s when learning how to change video quality on iPhone after recording becomes essential.
Common Reasons to Change Video Quality After Recording
You might want to change or reduce the quality of an existing iPhone video when:
- You’re running out of storage and want a smaller copy of the video
- You need to send the video via email or messaging apps with file size limits
- You’re uploading to social media and want to avoid extra compression
- You’re editing on an older device or computer that struggles with 4K or 60 fps footage
- You only need a quick preview clip, not the full‑quality master
What Is and Isn’t Possible After Recording
It’s important to set the right expectations:
- You cannot magically turn a low‑resolution clip into true 4K.
- You cannot change the original resolution and frame rate that the iPhone already saved.
However, you can:
- Export a new copy of the video at a lower resolution
- Compress the video to reduce its file size
- Change the format or bitrate to make it easier to share and store
Everything you do after recording is about creating a new version of the video, not rewriting the original.
Understanding iPhone Video Quality
Before you change anything, it helps to understand the basics of how iPhone handles video quality.
Resolution vs. Frame Rate vs. File Size
Three main factors influence how your video looks and how big the file is:
- Resolution – The number of pixels in the video (e.g., 720p, 1080p, 4K).
- Higher resolution = sharper image + larger file size.
- Frame rate (fps) – How many frames per second (e.g., 30 fps, 60 fps).
- Higher fps = smoother motion + larger file size.
- Bitrate – How much data is used to encode each second of video.
- Higher bitrate = better detail + larger file size.
When you change iPhone video quality after recording, you’re typically lowering the resolution and bitrate to shrink the file and make sharing easier.
Typical iPhone Recording Options
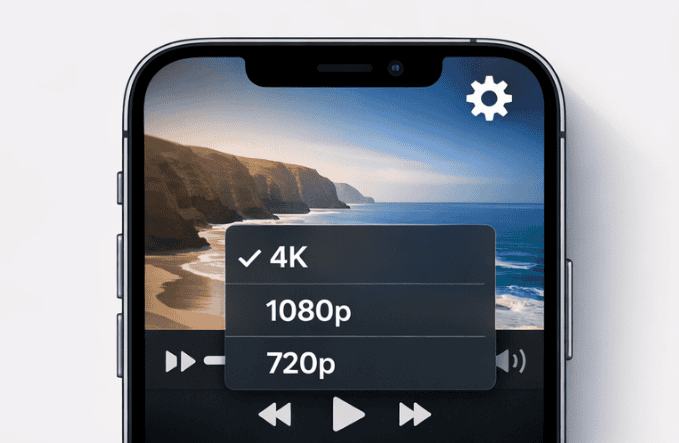
On most recent iPhones, under Settings > Camera > Record Video, you’ll see options like:
- 720p HD at 30 fps
- 1080p HD at 30 or 60 fps
- 4K at 24, 30, or 60 fps
Higher options (like 4K at 60 fps) look great but generate very large files. That’s why many users later look for ways to compress iPhone videos or change the quality after recording.
What “Quality” Really Means in Practice
When people talk about video quality, they’re usually referring to a mix of:
- Sharpness (how detailed the image looks)
- Smoothness (how fluid the motion appears)
- Clarity after compression (whether the video looks blocky or pixelated)
- File size vs. convenience (is the quality “good enough” for what you need?)
Your goal is to find the sweet spot between looking good and being practical to store and share.
Can You Change Video Quality After Recording on iPhone?
What You Cannot Change
Once a video is recorded:
- The original resolution is fixed (e.g., 4K, 1080p).
- The original frame rate is fixed (e.g., 30 fps, 60 fps).
You can’t go back and alter those settings on the original file.
What You Can Change
What you can do is create a new version of that video with different settings:
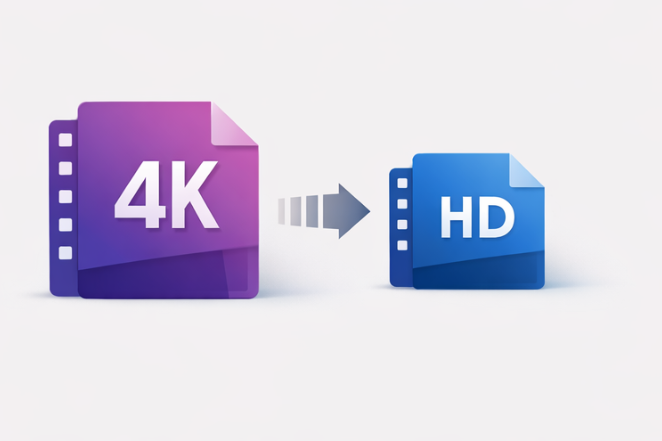
- Downscale the resolution (e.g., from 4K to 1080p or 720p)
- Lower the bitrate to reduce file size
- Change the format (e.g., to a more compatible or smaller one)
This is how you effectively change iPhone video quality after recording.
When It Makes Sense to Downscale
Downscaling is helpful when:
- You’re emailing the video and keep hitting attachment limits
- You’re sending a clip over WhatsApp, iMessage, or SMS/MMS
- You just want a quick version for social media and don’t need the full 4K master
- You’re trying to free up storage but still want to keep a watchable copy
How to Change Video Quality Using the Photos App
The Photos app doesn’t have a big button labeled “change quality,” but there are ways to effectively reduce size and simplify your video before you share or export it.
Step 1: Trim and Make Simple Edits
Before compressing, remove anything you don’t need:
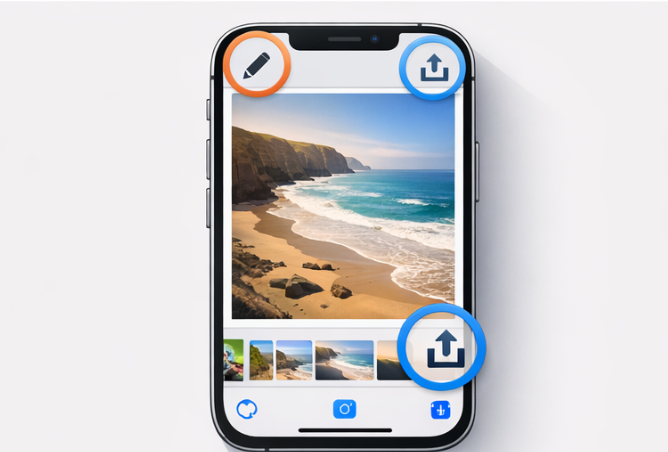
- Open Photos and tap your video.
- Tap Edit in the top‑right corner.
- Drag the start and end handles on the timeline to trim unnecessary parts.
- Tap Done and choose Save Video as New Clip (so you keep the original if you want).
A shorter video automatically means a smaller file.
Step 2: Export a Smaller Version by Sharing
Some apps compress your video automatically when you share from Photos:
- Open Photos and select your trimmed video.
- Tap the Share icon (square with an arrow).
- Choose your destination:
- Mail – Often offers size options like Small, Medium, Large, Actual Size.
- Messages – Compresses the video depending on your connection and carrier.
- Social apps – Instagram, Facebook, etc., will usually compress after upload.
If an app shows options like Small/Medium/Large/Actual Size, pick Small or Medium to reduce file size.
Limitations of Using Only Photos and Sharing
- You don’t always see the exact resolution or bitrate.
- Compression is often automatic and opaque—you have little control.
- You might need a more controlled approach if you want a specific output quality (e.g., 1080p for YouTube).
For better control over how to change video quality on iPhone after recording, iMovie or a third‑party app is often a better choice.
How to Change Video Quality with iMovie on iPhone
Apple’s free iMovie app gives you much more control over how your final video is exported.
Step 1: Install or Open iMovie and Import Your Video
- Download iMovie from the App Store if you don’t have it.
- Open iMovie and tap plus Create Project.
- Choose a movie.
- Select your video from your library and tap Create Movie.
Step 2: Make Basic Edits (Optional)
Inside iMovie, you can:
- Trim the clip further
- Split and delete sections you don’t need
- Add basic transitions or text (optional)
Once you’re satisfied, you’re ready to export at a different quality.
Step 3: Export at a Lower Resolution
- Tap Done in the top‑left corner.
- Tap the Share icon at the bottom.
- Tap Save Video.
- Choose an export size, such as:
- 360p
- 540p
- 720p
- 1080p
If your original video was 4K, saving at 1080p or 720p will significantly reduce iPhone video size while staying watchable.

How This Affects File Size and Visible Quality
- Lower resolution = smaller file size, but less sharp on large screens.
- Lower bitrate (handled automatically) = smaller file size, but too low may make the video look blocky.
For most users, exporting from 4K to 1080p is a great balance between quality and size.
Using Third‑Party Apps to Adjust Video Quality
If you want even more control, third‑party apps are an excellent way to compress iPhone videos with custom settings.
Types of Apps to Look For
Search the App Store for:
- Video compressor
- Video converter
- Video editor
Look for apps that let you:
- Choose output resolution
- Set or adjust bitrate
- Change format (e.g., MP4/H.264, HEVC/H.265)
Typical Workflow in These Apps
While each app is different, the general process is similar:
- Import the video from your camera roll.
- Choose the output resolution (e.g., 720p or 1080p).
- Adjust the bitrate—lower for smaller files, higher for better quality.
- Optionally choose a format (HEVC usually gives smaller files at similar quality).
- Tap Convert, Compress, or Export.
- Save back to Photos or export directly to another app.
Pros and Cons of Using iMovie and Photos
Pros:
- More control over output resolution and bitrate
- Often show estimated output size before conversion
- Can handle batch compression (multiple videos at once)
Cons:
- Some features may require in‑app purchases or subscriptions
- Interface quality varies by app
- Need to grant access to your photos/videos
If you frequently need to change iPhone video quality after recording, a dedicated compressor app can save a lot of time.
Also Read: How to Speed Up Your Old Android Phone in 15 Minutes
Changing Video Quality for Social Media Posting
Social media platforms apply their own compression, which can drastically affect how your video looks.
How Social Apps Handle Compression
- Instagram & TikTok – Recompress your video to fit their specs, often reducing quality.
- WhatsApp – Compresses heavily to keep file sizes small, especially on cellular data.
- Facebook – Re-encodes for streaming, which can soften the image.
Because of this, it’s smart to control the first round of compression yourself.
Best Practices Before Uploading
To keep your videos looking sharp:
- Edit and export from iMovie or a video editor at the target resolution used by the platform (often 1080p).
- Choose a moderate bitrate—high enough for clarity but not excessively large.
- Avoid uploading a video that has been compressed multiple times (e.g., sent via WhatsApp, downloaded, then re‑uploaded).
Tips to Keep Videos Looking Sharp After Upload
- Record in good lighting to reduce noise (noise compresses poorly and looks grainy).
- Avoid extreme zoom; digital zoom reduces detail.
- Use stabilization (built‑in or via a tripod) to reduce motion blur.
- Export in vertical (9:16) or square if that’s what the platform prefers (e.g., TikTok, Reels).
Managing Storage: Reducing the Size of Existing Videos
If your iPhone storage is constantly full, compressing and cleaning up existing videos is one of the fastest fixes.
Identifying Large Videos in Your Library
You can:
- Go to Settings > General > iPhone Storage and look at Photos usage.
- Use third‑party apps that scan your library and highlight the largest video files.
Steps to Compress and Re‑Save a Smaller Copy
- Choose your compression method (iMovie or a compressor app).
- Import the large video.
- Export a new version at a lower resolution (e.g., 1080p instead of 4K, or 720p instead of 1080p).
- Confirm the new file size in the app or after saving.
Safely Deleting the Original
Once you’re satisfied with the quality of the compressed version:
- Go back to Photos.
- Locate the original large file.
- Delete it and then clear it from Recently Deleted to actually free space.
Make sure you’ve safely stored the new version (or a backup in the cloud) before deleting anything important.
Using iCloud or External Storage
If you don’t want to give up your full‑quality masters:
- Turn on iCloud Photos and use Optimize iPhone Storage to keep smaller copies on your device.
- Back up full‑quality videos to:
- A computer via Finder or iTunes
- A cloud service like Google Drive, Dropbox, or OneDrive
- A Lightning/USB‑C external drive (on compatible devices)
How to Change Video Quality for Future Recordings
The easiest way to avoid constantly compressing videos later is to choose the right settings before you hit record.
Adjusting Camera Settings Before You Shoot
- Open Settings on your iPhone.
- Scroll down and tap Camera.
- Tap Record Video.
- Choose a default recording option, such as:
- 1080p HD at 30 fps – A great balance of quality and file size for most people.
- 4K at 30 fps – Higher quality, but much larger files.
- 720p HD at 30 fps – Smaller files, but noticeably lower quality on larger screens.
You can also adjust Slow Motion and HDR Video settings here, depending on how you shoot.
Balancing Quality and Storage
Ask yourself:
- Do you usually watch videos only on your phone? → 1080p is usually enough.
- Are your videos for professional work, YouTube, or client projects? → 4K might be worth it.
- Do you get frequent “Storage Almost Full” warnings? If yes, stick to 1080p or even 720p.
Choosing sensible defaults reduces how often you’ll need to change iPhone video quality after recording.
When to Use “High Efficiency” vs. “Most Compatible”
Go to Settings > Camera > Formats and pick:
- High Efficiency (HEIF/HEVC)
- Uses modern compression for smaller file sizes at similar quality.
- Best if you want to save space and mainly use newer devices and platforms.
- Most Compatible (JPEG/H.264)
- Larger files but work better with older devices, apps, and computers.
If your priority is to reduce iPhone video size while maintaining good quality, High Efficiency is usually the better choice.
Troubleshooting & FAQs
Why Can’t I Make a Low‑Quality Video Look Like True 4K?
Upscaling a low‑resolution video to 4K doesn’t create real detail. It just stretches what’s already there. The file might have 4K dimensions, but it won’t look like it was originally shot in 4K. To get true 4K quality, you must record in 4K from the start.
Why Does My Exported Video Still Look Large?
Your exported video may still be big if:
- You kept the resolution high (e.g., 4K or full 1080p).
- The app used a high bitrate to preserve quality.
- The clip is still long, even after trimming.
Try exporting again at:
A lower bitrate (if your compression app lets you change it).
A lower resolution (e.g., 720p instead of 1080p), or
A lower bitrate (if your compression app lets you change it).
My Video Looks Blurry After Sending—What Likely Happened?
Most messaging and social apps compress videos aggressively. They may:
- Reduce the resolution
- Lower the bitrate
- Convert to a more compressed format
To improve results:
- Send via Mail using a larger size option.
- Share a cloud link (iCloud, Google Drive, Dropbox) instead of sending the raw file.
- Compress the video yourself to a balanced quality and then send that version.
How Do I Check a Video’s Resolution and Size on iPhone?
You can:
- Save the video to the Files app, tap and look for Info/Details.
- Use a third‑party video app that displays resolution, frame rate, and file size when you import the clip.
- Transfer the video to a Mac or PC and check the file properties there.
Conclusion
Learning how to change video quality on iPhone after recording gives you control over both how your videos look and how much space they take up. While you can’t rewrite the original resolution and frame rate, you can create optimized versions that are easier to share, upload, and store.
What You Can Change After Recording
- Export to a lower resolution (e.g., from 4K to 1080p or 720p)
- Compress the file with iMovie or third‑party apps
- Adjust the bitrate and format to shrink the file size
Quick Checklist for Compressing or Resaving at a Different Quality
- Trim unnecessary parts in the Photos app
- Export from iMovie at a lower resolution (720p or 1080p)
- Use a video compressor app for fine control over bitrate and format
- Verify that the new version looks good and note the file size
- Back up important originals, then delete large files you no longer need
By combining smarter camera settings for future recordings with simple post‑recording adjustments, you’ll spend less time wrestling with huge files and more time enjoying and sharing your videos exactly how you want.